Contents
- 1 Why Image SEO Matters: The Search Engine Perspective
- 2 Where Can Images Appear in Search Results?
- 3 Essential Image Optimization Techniques for Faster Loading
- 4 Semantic Optimization for Better Image Search Rankings
- 5 Technical Image SEO Implementation
- 6 Advanced Image SEO Strategies
- 7 Measuring Image SEO Success
- 8 Common Image SEO Mistakes to Avoid
- 9 Frequently Asked Questions
- 10 1: Will compressing images noticeably reduce their quality?
- 10.1 2: How do I know if my images are slowing down my website?
- 10.2 3: Is WebP supported by all browsers now?
- 10.3 4: Should I use lazy loading for all images?
- 10.4 5: How important are image sitemaps compared to other image SEO tactics?
- 10.5 6: How can I check if my images have proper alt text?
- 10.6 7: Do I need to optimize my logo and other small images?
- 10.7 8: How often should I audit my site’s images?
- 11 Conclusion
Have you ever clicked on a website, only to watch it crawl to life as images slowly load in chunks? Chances are, you didn’t wait around—and your visitors won’t either.
Here’s a surprising stat: images can account for up to 90% of a webpage’s total size. That means even if your content is perfect and your keywords are on point, heavy, unoptimized images could be silently hurting your rankings and user experience. In fact, Google has confirmed that site speed is a ranking factor, and slow-loading pages often struggle to perform—both in search results and in keeping people engaged.
But image optimization isn’t just for developers or design geeks. It’s one of the easiest and highest-impact SEO wins you can implement. For example, swapping a PNG for a properly compressed WebP image can slash load times without sacrificing quality. Whether you’re managing an online store with dozens of product shots or a content-rich blog with featured images, learning how to optimize those visuals can mean the difference between a visitor bouncing—or converting.
But don’t worry, you don’t have to be a tech wizard to fix this. Optimizing your images is one of the easiest ways to boost your site’s speed and SEO. And when you pair it with other tactics, like internal linking, you’re setting your site up for even more success.
In this guide, we’ll break down everything you need to know to turn your images into fast-loading, SEO-friendly assets. No fluff, no jargon—just real strategies that make a real difference.
Why Image SEO Matters: The Search Engine Perspective
Before diving into optimization tactics, let’s understand why search engines care so deeply about your images:
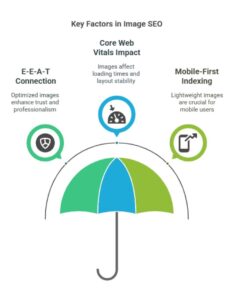
The E-E-A-T Connection
As outlined in Google’s quality guidelines, Experience, Expertise, Authoritativeness, and Trustworthiness (E-E-A-T) apply to your visual content too. Properly optimized images signal to search engines that you’re providing a professional, trustworthy user experience.
Core Web Vitals Impact
Google’s Core Web Vitals—particularly Largest Contentful Paint (LCP) and Cumulative Layout Shift (CLS)—are directly influenced by how you handle images. When users abandon pages due to slow-loading images or shifting layouts, search engines notice these negative user signals.
Mobile-First Indexing Reality
With Google’s mobile-first indexing approach, image optimization isn’t optional—it’s essential. Mobile users often browse on limited data plans or unstable connections, making lightweight images crucial for engagement.
Where Can Images Appear in Search Results?
One of the biggest benefits of image SEO is getting your images to show up in different parts of search results, bringing more visitors to your website.
Google Images
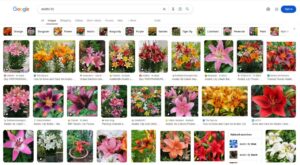
Many people go straight to Google Images when looking for visual content. If your product or blog images are well-optimized, they can appear prominently here, giving you an extra way to attract visitors.
Visual Search with Google Lens
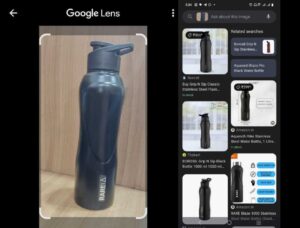
Google Lens has become incredibly popular, with billions of people using it every month. When someone takes a picture of something they’re interested in, Google Lens can identify it and link to relevant websites—including yours if your images are properly optimized.
Standard Search Engine Result Pages
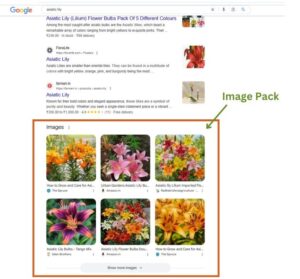
Images don’t just appear in separate image searches. They frequently show up in regular search results too.
Recent data shows that over half of all Google search results pages in the US include image packs—groups of images related to what someone searched for. These visual elements stand out among text results and naturally attract clicks.
Beyond Just Images
Remember that optimizing your images isn’t just about appearing in image searches. Fast-loading, properly tagged images help your entire page perform better, which can boost your rankings across all search results.
Good image SEO is a win-win: your images appear in more places, and your overall website performance improves too.
Essential Image Optimization Techniques for Faster Loading
Let’s explore the fundamental optimization techniques that will dramatically improve your page speed:
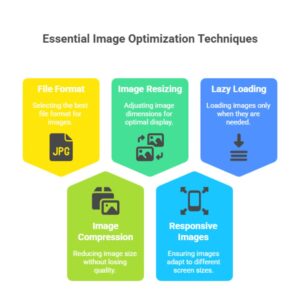
1. Choose the Right File Format
Different image formats serve different purposes:
- JPEG: Best for photographs and complex images with many colors
- PNG: Ideal for images requiring transparency or with few colors
- WebP: Modern format offering superior compression (25-34% smaller than JPEG/PNG)
- SVG: Perfect for logos, icons, and simple graphics that need to scale
Example: A product photo with a plain background should be a JPEG, while your site logo with transparency should be PNG or ideally SVG.
2. Compress Images Without Quality Loss
Image compression is the art of reducing file size while maintaining visual quality:
- Lossless compression: Reduces file size without affecting quality (ideal for graphics)
- Lossy compression: Achieves greater size reduction by selectively discarding data (works well for photographs)
Tools worth exploring:
- TinyPNG/TinyJPG
- Squoosh by Google
- ImageOptim (Mac)
- GIMP (free alternative to Photoshop)
- WordPress plugins like Smush or ShortPixel
Practical example: A 2500×1500 pixel product image might start at 5MB. With proper compression, you can reduce it to 100-200KB with no visible quality loss.
3. Resize Images to Appropriate Dimensions
Never rely on HTML or CSS to resize oversized images:
<!-- AVOID THIS: -->
<img src="huge-5000px-image.jpg" width="500" height="300">
Instead, resize the actual image file to match your display needs. If your content area is 800px wide, there’s no reason to upload 2500px images.
4. Implement Responsive Images
Use the HTML srcset attribute to serve different image sizes based on device screen width:
<img srcset="small-image.jpg 500w,
             medium-image.jpg 1000w,
             large-image.jpg 1500w"
     sizes="(max-width: 600px) 500px,
            (max-width: 1200px) 1000px,
            1500px"
     src="fallback-image.jpg"
     alt="Descriptive alt text">
This technique ensures mobile users don’t download unnecessarily large images, saving bandwidth and improving load times.
5. Utilize Lazy Loading
Lazy loading defers the loading of off-screen images until users scroll near them:
<img src="image.jpg" loading="lazy" alt="Descriptive alt text">Modern browsers support native lazy loading, but you can also use JavaScript libraries for broader compatibility.
Semantic Optimization for Better Image Search Rankings
While speed optimization is crucial, semantic optimization helps search engines understand your images and improves their chances of appearing in image search results:
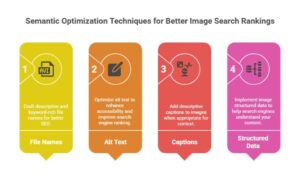
1. Craft Descriptive, Keyword-Rich File Names
Before uploading, rename your images with descriptive filenames:
- Poor: IMG_12345.jpg
- Better: blue-denim-jacket-front-view.jpg
Use hyphens between words (not underscores) as Google reads hyphens as word separators.
2. Optimize Alt Text for Accessibility and SEO
Alt text serves dual purposes: helping visually impaired users and giving search engines context about your image.
Alt text best practices:
- Be specific and descriptive (30-70 characters)
- Include relevant keywords naturally
- Avoid keyword stuffing
- Describe the image accurately
Example:
<!-- POOR: -->
<img src="jacket.jpg" alt="jacket">

<!-- BETTER: -->
<img src="blue-denim-jacket-front-view.jpg" alt="Vintage blue denim jacket with brass buttons and front pockets">
3. Add Descriptive Captions When Appropriate
Image captions are read 300% more than body text, according to eye-tracking studies. They provide context for both users and search engines:
<figure>
  <img src="blue-denim-jacket-front-view.jpg" alt="Vintage blue denim jacket with brass buttons">
  <figcaption>Our bestselling vintage-inspired denim jacket features authentic brass hardware and reinforced stitching.</figcaption>
</figure>
4. Implement Image Structured Data
Schema markup helps search engines understand your images better and can earn rich results:
<script type="application/ld+json">
{
  "@context": "https://schema.org/",
  "@type": "ImageObject",
  "contentUrl": "https://example.com/images/blue-denim-jacket.jpg",
  "description": "Vintage blue denim jacket with brass buttons and reinforced stitching",
  "name": "Classic Denim Jacket"
}
</script>
For product images, consider using Product schema with image properties for enhanced e-commerce visibility.
Technical Image SEO Implementation
These technical aspects ensure search engines can properly discover, crawl, and index your images:
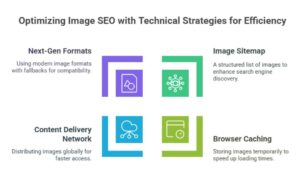
1. Create and Submit an Image Sitemap
An image sitemap helps search engines discover images that might be missed during regular crawling:
<url>
  <loc>https://www.example.com/sample-page/</loc>
  <image:image>
    <image:loc>https://www.example.com/images/blue-denim-jacket.jpg</image:loc>
    <image:title>Classic Blue Denim Jacket</image:title>
    <image:caption>Vintage-inspired denim jacket with brass hardware</image:caption>
  </image:image>
</url>
Submit this sitemap through Google Search Console for improved indexing.
2. Enable Browser Caching
Browser caching stores certain files (like images) for a specified period, so they don’t need to be redownloaded on subsequent visits:
# Apache (.htaccess)
<FilesMatch "\.(jpg|jpeg|png|gif|webp)$">
  Header set Cache-Control "max-age=31536000, public"
</FilesMatch>
Real-world example: If your site logo is cached for 365 days, it’ll load instantly when users navigate between pages or revisit your site within that year. Without caching, the browser would need to download the image again on every page load.
You can use Google Lighthouse to check if your images are properly cached. Look for the “Serve static assets with an efficient cache policy” recommendation.
3. Use a Content Delivery Network (CDN)
CDNs store copies of your images on servers worldwide, delivering them from locations closer to your users:
How it works in practice:
- Data takes 3 seconds to travel from a U.S. server to a user in Australia
- But only 1 second from a local server in Asia or Australia
Implementation steps:
- Choose a CDN provider (Cloudflare, Amazon CloudFront, BunnyCDN)
- Integrate the CDN with your website (often via plugin)
- Upload your images to the CDN
- Update your DNS records to route image requests through the CDN
- Modify your website HTML to reference the new image URLs
Many CDNs also offer automatic image optimization features that handle compression and format conversion.
4. Implement Next-Gen Image Formats with Fallbacks
WebP offers superior compression but isn’t supported by all browsers. Use this HTML pattern to provide fallbacks:
<picture>
  <source srcset="image.webp" type="image/webp">
  <source srcset="image.jpg" type="image/jpeg">
  <img src="image.jpg" alt="Descriptive alt text">
</picture>
Advanced Image SEO Strategies
Take your image optimization to the next level with these advanced techniques:
1. Optimize for Visual Search
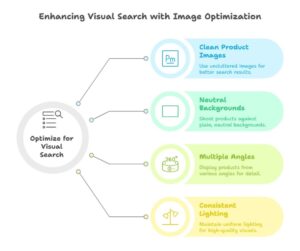
As visual search grows through Google Lens and Pinterest Lens, consider:
- Using clean, uncluttered product images
- Shooting against neutral backgrounds
- Showcasing products from multiple angles
- Ensuring consistent lighting and high visual quality
2. Create Custom Open Graph and Twitter Card Images
Social sharing images affect click-through rates and brand perception:
<!-- Open Graph -->
<meta property="og:image" content="https://example.com/social-share-image.jpg">
<meta property="og:image:width" content="1200">
<meta property="og:image:height" content="630">

<!-- Twitter Card -->
<meta name="twitter:card" content="summary_large_image">
<meta name="twitter:image" content="https://example.com/social-share-image.jpg">
Real-world example: Semrush’s homepage uses these Open Graph tags:
<meta property="og:url" content="https://semrush.com/">
<meta property="og:type" content="website">
<meta property="og:title" content="Semrush - Online Marketing Can Be Easy">
<meta property="og:description" content="Turn the algorithm into a friend. Make your business visible online with 55+ tools for SEO, PPC, content, social media, competitive research, and more.">
<meta property="og:image" content="https://static.semrush.com/wt-static/semrush-com.png">
<meta property="og:image:width" content="1366">
<meta property="og:image:height" content="768">
This ensures their content appears professionally branded when shared on social platforms.
3. Implement ARIA Attributes for Enhanced Accessibility
For complex images or those with interactive elements, use ARIA attributes:
<img src="complex-chart.jpg" alt="Q3 Sales Performance Chart"
     aria-describedby="chart-description">
<div id="chart-description" class="visually-hidden">
  Detailed description of what the chart shows, including key data points and trends.
</div>
4. Audit Your Current Image Implementation
Use tools like Semrush’s Site Audit to identify image-related issues on your site. The tool checks for:
- Broken internal images
- Broken external images
- Missing alt attributes
- Slow-loading pages where images might be the culprit
- Resources blocked by robots.txt
- Improperly formatted image links
Example workflow: After running a Site Audit, filter issues by searching for “image” and prioritize fixing errors before moving to warnings and notices.
Measuring Image SEO Success
Track these metrics to gauge the effectiveness of your image optimization efforts:
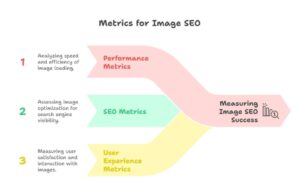
Performance Metrics
- Page load time (via Google PageSpeed Insights)
- Largest Contentful Paint (LCP)
- Time to First Byte (TTFB)
- Mobile-specific loading times
SEO Metrics
- Image search traffic (Google Search Console)
- Image rich results impressions
- Overall organic traffic trends
- Bounce rate changes
User Experience Metrics
- Page session duration
- Pages per session
- Conversion rate impacts
Example dashboard setup: Create a Google Data Studio dashboard combining Google Analytics and Search Console data to monitor these metrics over time.
Common Image SEO Mistakes to Avoid
Even experienced developers make these common image optimization errors:
- Forgetting to compress images before uploading
- Using generic filenames and alt text
- Uploading images at dimensions much larger than needed
- Ignoring mobile users when optimizing images
- Using incorrect file formats (like PNG for photographs)
- Failing to implement lazy loading for below-the-fold images
- Relying on CMS default image handling without additional optimization
- Overlooking image accessibility requirements
- Blocking image resources in robots.txt
- Using image links where page links should be used
Frequently Asked Questions
1: Will compressing images noticeably reduce their quality?
A: With modern compression tools, you can typically reduce file sizes by 30-70% without perceptible quality loss. The key is using the right compression type (lossy vs. lossless) for your specific image content.
2: How do I know if my images are slowing down my website?
A: Use tools like Google PageSpeed Insights, GTmetrix, or WebPageTest to analyze your page performance. These tools will specifically identify if images are contributing to slow load times and by how much.
3: Is WebP supported by all browsers now?
A: As of 2025, WebP enjoys broad support across all major browsers including Chrome, Firefox, Safari, and Edge. However, for maximum compatibility, it’s still recommended to provide JPEG/PNG fallbacks using the <picture> element.
4: Should I use lazy loading for all images?
A: Lazy loading is most beneficial for images below the fold. For critical above-the-fold images (especially your LCP element), eager loading is preferred to ensure they display immediately during the initial page load.
5: How important are image sitemaps compared to other image SEO tactics?
A: Image sitemaps are particularly valuable for sites with large image libraries or where images are loaded via JavaScript. While not as critical as compression and proper alt text, they provide an additional discovery path for search engines and should be part of a comprehensive image SEO strategy.
6: How can I check if my images have proper alt text?
A: You can use tools like Semrush’s Site Audit, which will identify images missing alt attributes. You can also manually inspect your page source code or use browser extensions like WAVE or axe to check for accessibility issues.
7: Do I need to optimize my logo and other small images?
A: Yes, every image contributes to page load time. While the impact of small images is less significant than larger ones, optimizing them still improves performance—especially for repeat visitors when combined with proper caching.
8: How often should I audit my site’s images?
A: It’s good practice to audit your images quarterly or after major site updates. Additionally, make sure to implement an image optimization workflow for all new content so that proper practices become standard.
Conclusion
Image optimization represents the perfect intersection of technical SEO, user experience, and content quality—three pillars that search engines increasingly value. By implementing the strategies in this guide, you’ll not only improve your page speed and rankings but also create a more engaging, accessible experience for your visitors.
Remember that image SEO isn’t a one-time task but an ongoing process. As new image formats emerge and search algorithms evolve, staying current with best practices will continue to give your site a competitive edge. Start by auditing your current images, prioritizing fixes for your most important and traffic-heavy pages, and gradually implementing these optimizations across your entire site.
Your next step is clear: run a PageSpeed Insights analysis on your most important pages to identify specific image optimization opportunities, then apply what you’ve learned in this guide to transform those heavy, unoptimized images into powerful assets for both users and search engines.
Hi, I’m Mitu Chowdhary — an SEO enthusiast turned expert who genuinely enjoys helping people understand how search engines work. With this Blog, I focus on making SEO feel less overwhelming and more approachable for anyone who wants to learn — whether you’re just getting started or running a business and trying to grow online.
I write for beginners, small business owners, service providers — anyone curious about how to get found on Google and build a real online presence. My goal is to break down SEO into simple, practical steps that you can actually use, without the confusing technical jargon.
Every post I share comes from a place of wanting to help — not just to explain what SEO is, but to show you how to make it work for you. If something doesn’t make sense, I want this blog to be the place where it finally clicks.
I believe good SEO is about clarity, consistency, and a bit of creativity — and that’s exactly what I try to bring to every article here.
Thanks for stopping by. I hope you find something helpful here!